
使用Ventoy安装ISO镜像系统
Install ISO System with Ventoy
Windows 系统安装(一)
Windows Installation (Part 1)
一、准备工作
1. Preparation
准备一个U盘,键盘。
Prepare a USB flash drive and a keyboard.
在官网上下载“ventoy-1.0.97”
Download "ventoy-1.0.97" from the official website.
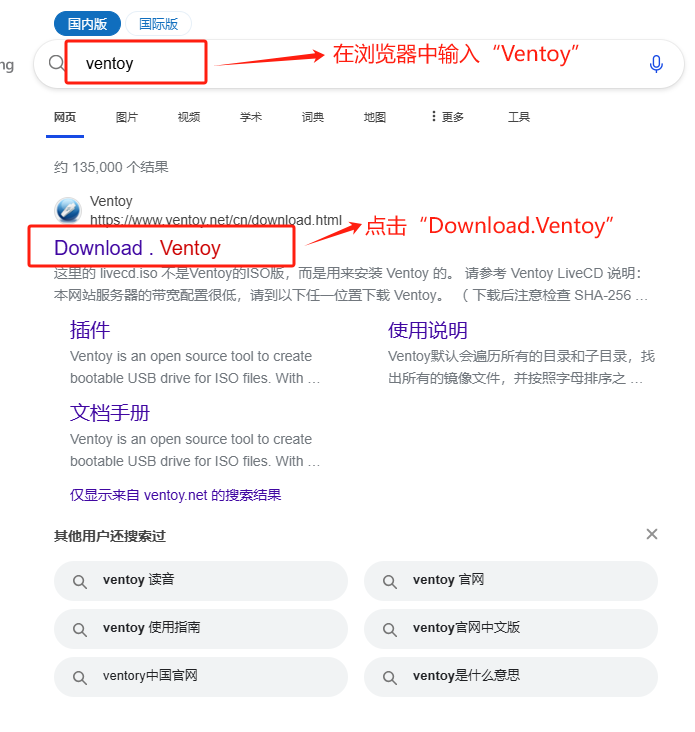
图:官网Ventoy页面
Fig: Ventoy official page
点击“Download.Ventoy”进入Ventoy下载页面,并选择Windows版下载
Click "Download.Ventoy" to enter the download page, then select the Windows version.
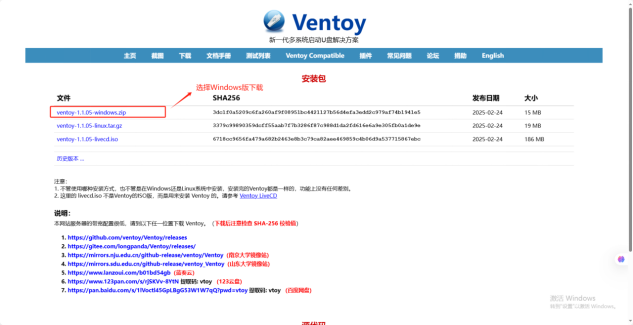
进入到Windows版下载页面并点击下载
Go to the Windows download page and click download.
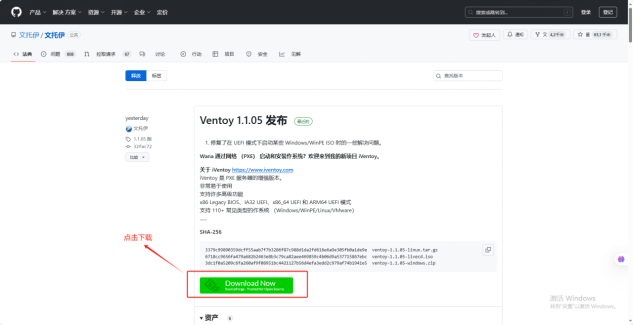
再次点击下载
Click download again.
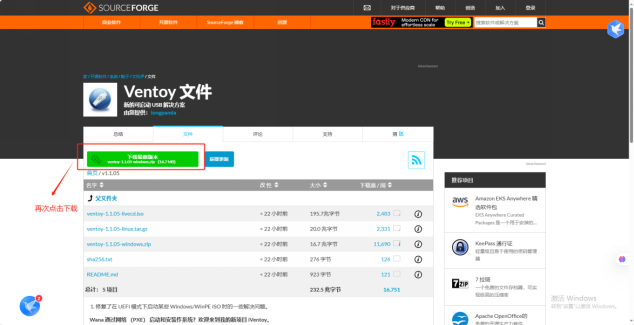
下载成功后,将文件“ventoy-1.1.05-windows.zip”解压
After downloading, extract "ventoy-1.1.05-windows.zip".
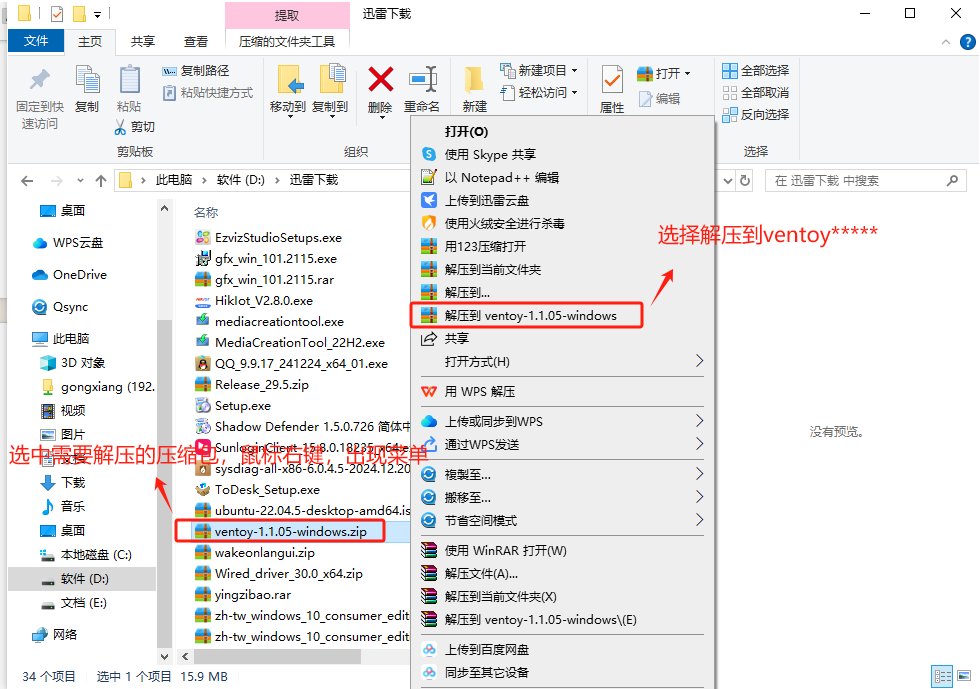
打开ventoy文件夹,找到其中的“Ventoy2Disk.exe”应用程序
Open the ventoy folder and find "Ventoy2Disk.exe".
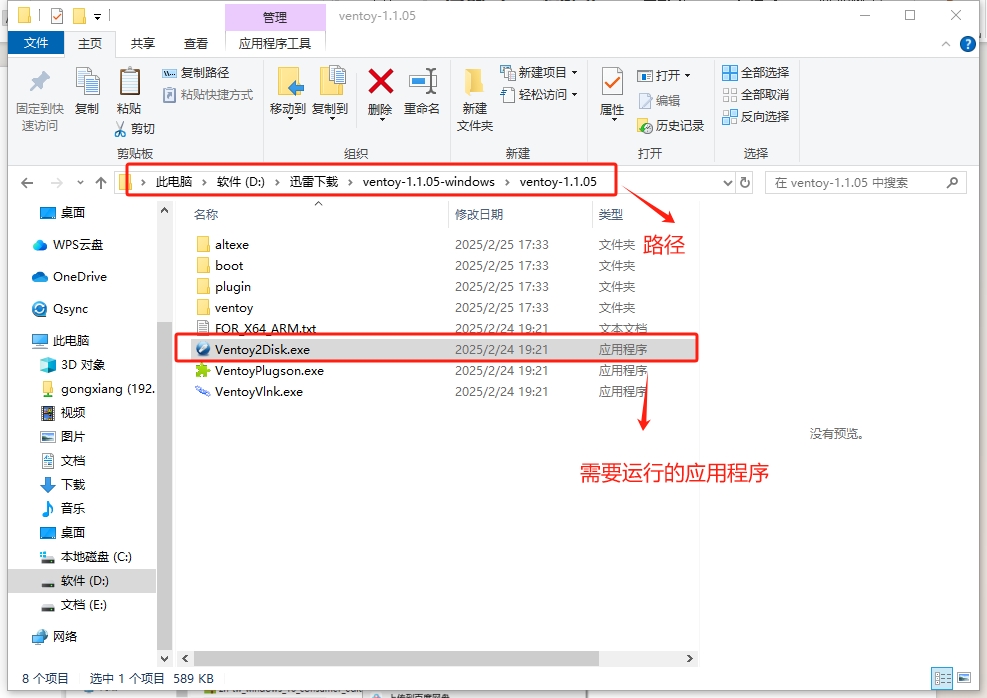
注意:安装Ventoy,U盘会被格式化,请拿一个没有用过或者先把U盘中的数据拷贝出来。
Note: Installing Ventoy will format the USB drive. Use an empty drive or back up your data first.
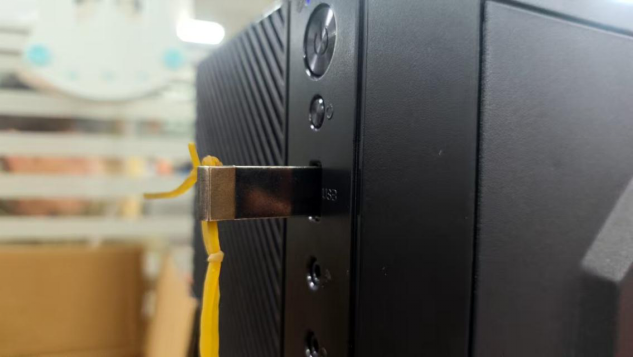
将U盘插入电脑
Insert the USB drive into the computer.
运行“Ventoy2Disk.exe”程序
Run "Ventoy2Disk.exe".
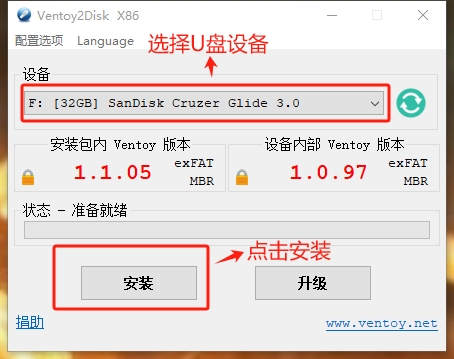
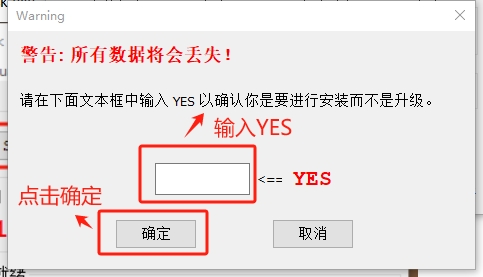
输入“YES”,点击“确定”
Type "YES" and click "OK".
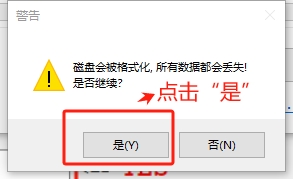
弹出提示,点击“是”
A prompt appears, click "Yes".
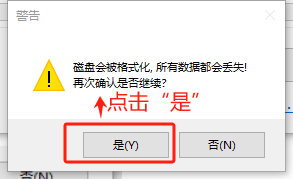
弹出提示,再次点击“是”
Prompt again, click "Yes".
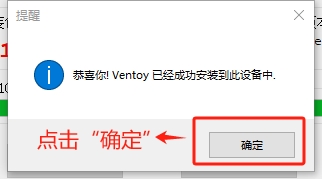
弹出提示,点击“确定”
Prompt appears, click "OK".
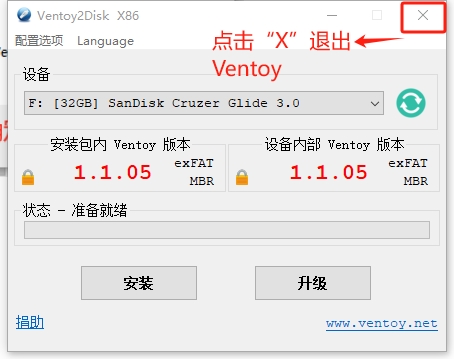
退出Ventoy
Exit Ventoy.
二、使用Ventoy安装步骤
2. Installation steps using Ventoy
将系统镜像(ISO)文件复制到ventoy中
Copy the system ISO file into the Ventoy USB drive.
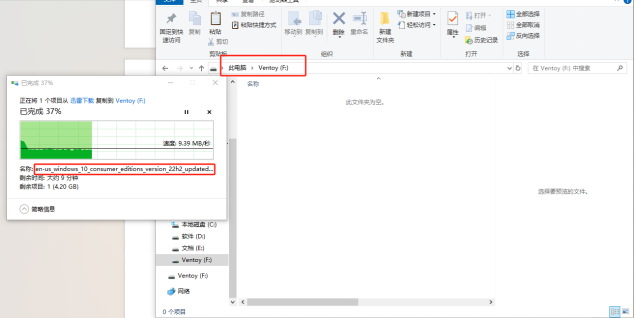
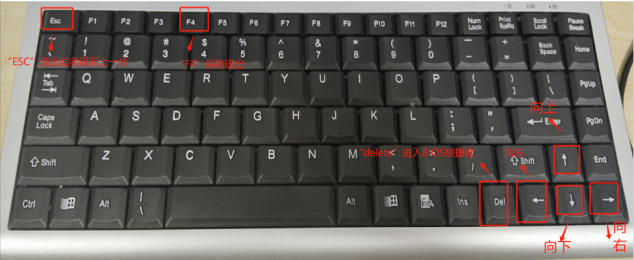
然后再将U盘插入需要安装系统的电脑中,然后重启电脑,按键盘上的“Del”又名“delete”键位进入到BIOS界面
Insert the USB into the target computer, restart, and press "Del" (Delete) key to enter BIOS.
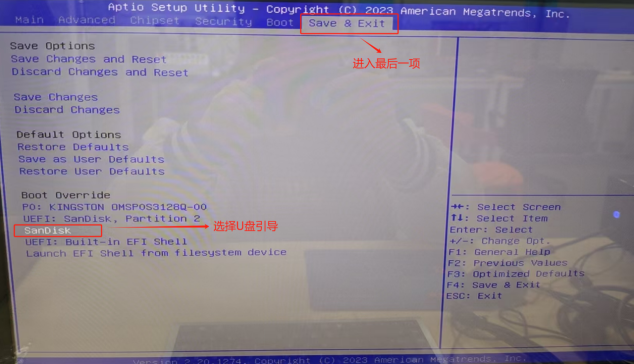
先进入“Save&Exit”,再选择进入U盘引导“SanDisk”,并按键盘上的回车键(Enter)
Go to "Save & Exit", select the USB drive "SanDisk", and press Enter.
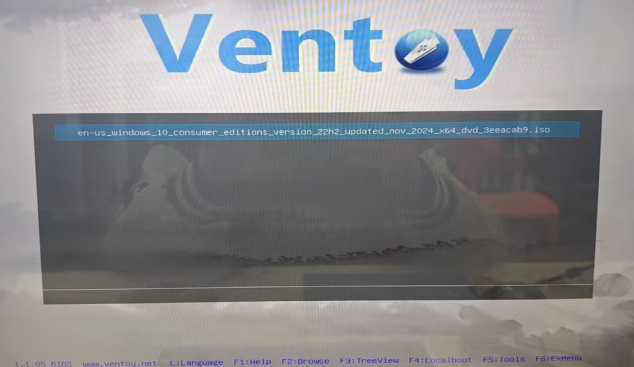
进入Ventoy页面,按键盘上的方向键去选择需要安装的系统,并按键盘上的回车键(Enter)
In the Ventoy menu, use arrow keys to select the desired ISO and press Enter.
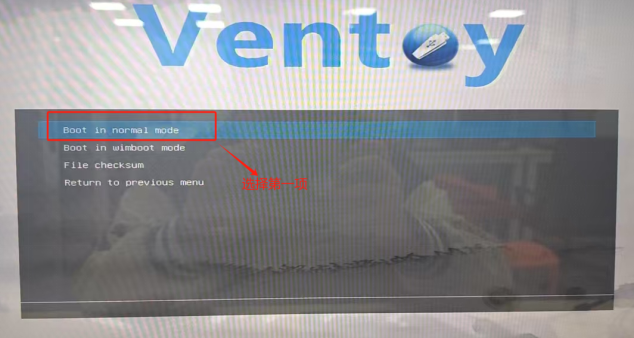
进入系统选择模式安装,选择**项(正常模式安装),并按键盘上的回车键(Enter)
Choose the first option (normal mode) and press Enter.
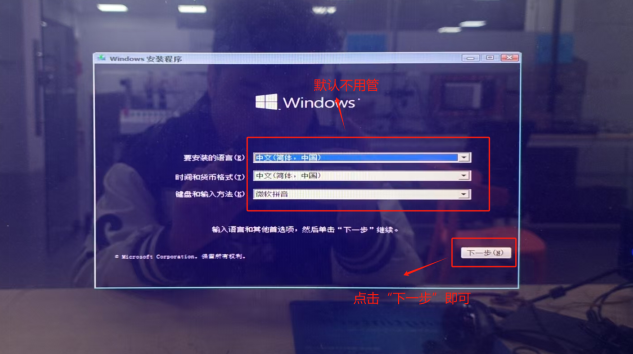
进入系统安装页面,点击“下一步”
Windows setup appears, click "Next".
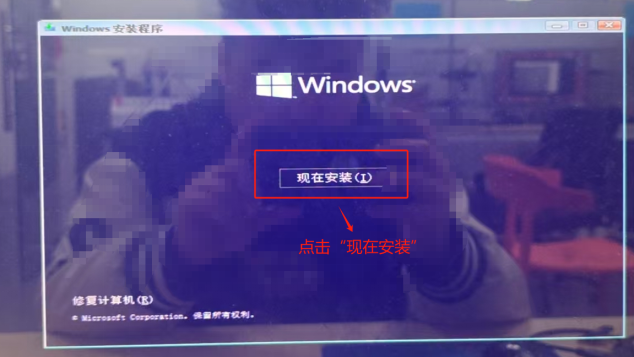
点击“现在安装”
Click "Install now".
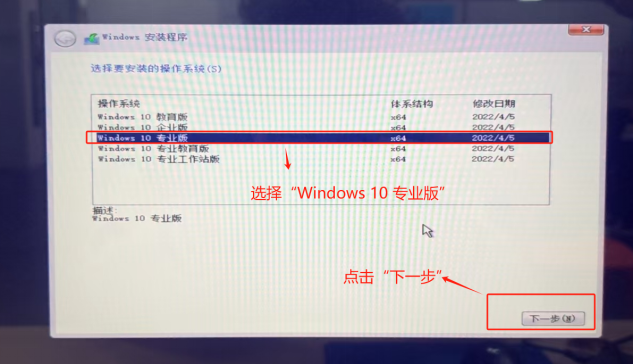
在Windows安装程序中选择“Windows 10 专业版”,点击“下一步”
Select "Windows 10 Pro" and click "Next".
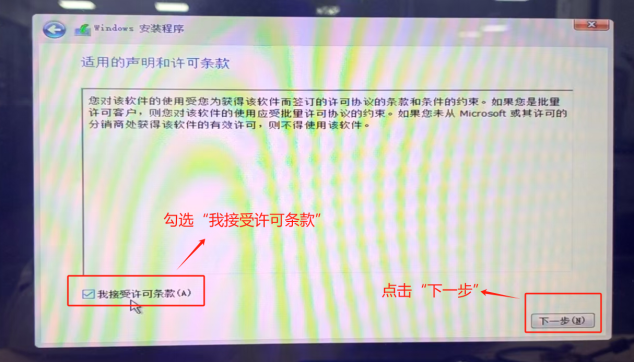
勾选“我接受许可条款”,点击“下一步”
Check "I accept the license terms" and click "Next".
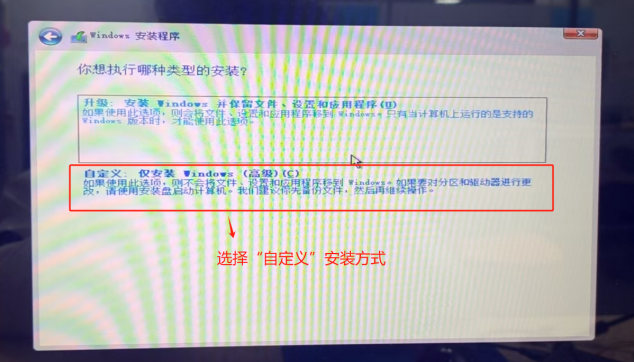
选择“自定义”安装方式
Choose "Custom: install Windows only (advanced)".
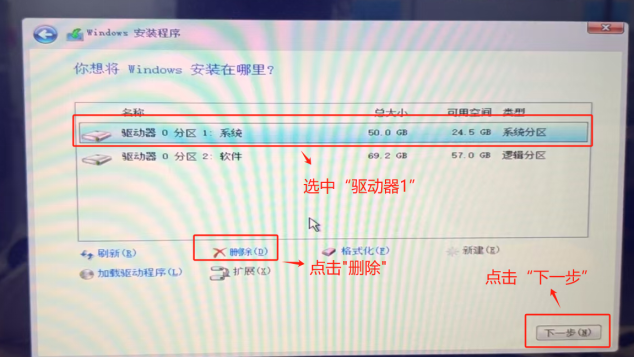
选中“驱动器0分区1:系统”,点击“删除”,点击“下一步”
Select "Drive 0 Partition 1: System", click "Delete", then "Next".
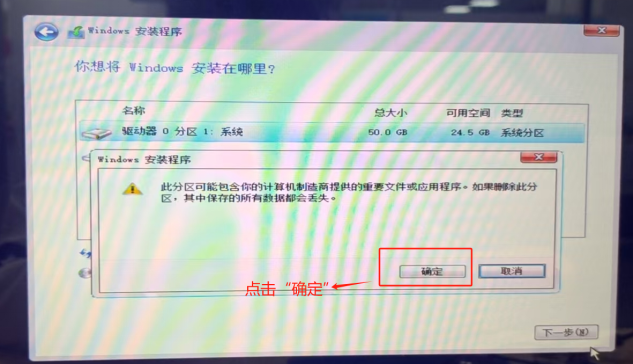
弹出警告提示,点击“确定”
Confirmation prompt, click "OK".
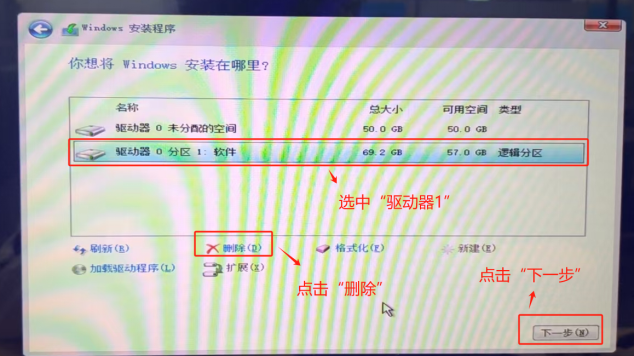
选中“驱动器0分区1:软件”,点击“删除”,点击“下一步”
Select "Drive 0 Partition 2: Software", click "Delete", then "Next".
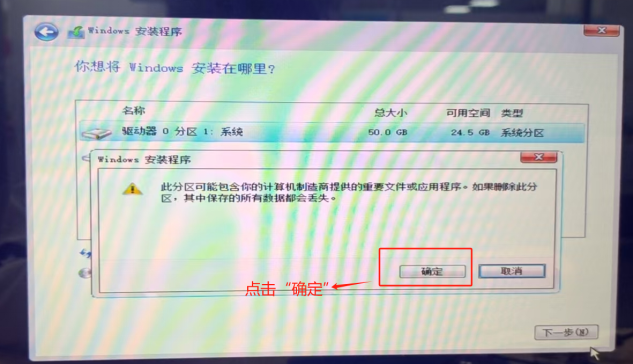
弹出警告提示,点击“确定”
Warning again, click "OK".
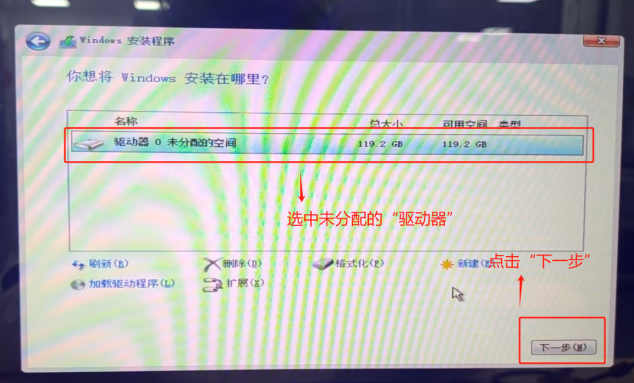
选中“驱动器0未分配的空间”,点击“下一步”
Select "Drive 0 unallocated space", click "Next".
系统安装程序启动,等待安装完成
Installation starts, wait for it to complete.
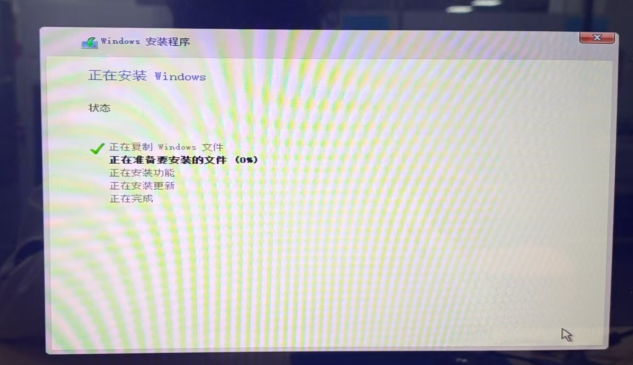
系统安装完成后,自动进入系统设置页面,需要我们去设置用户名,密码等...........
After installation, the setup screen appears to set username, password, etc.
点击“是”
Click "Yes".
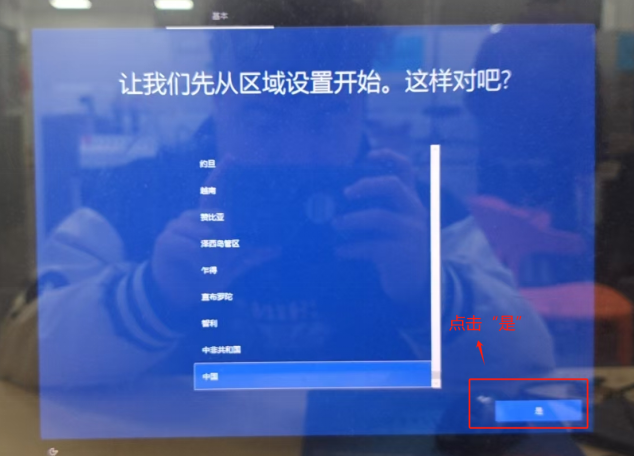
点击“是”
Click "Yes".
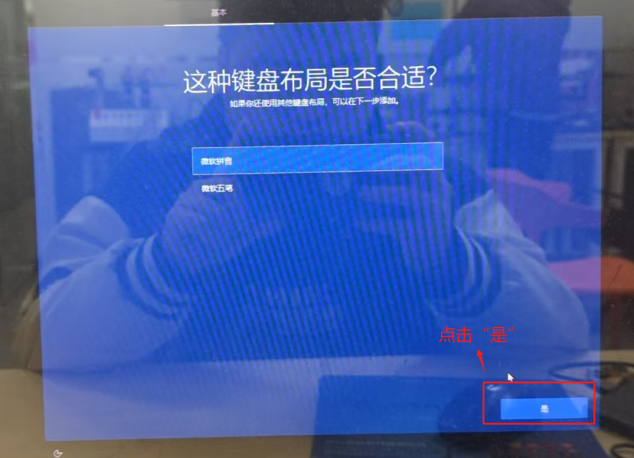
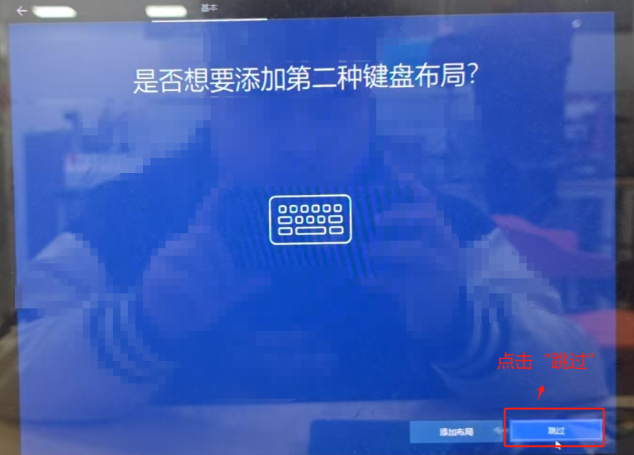
点击“跳过”
Click "Skip".
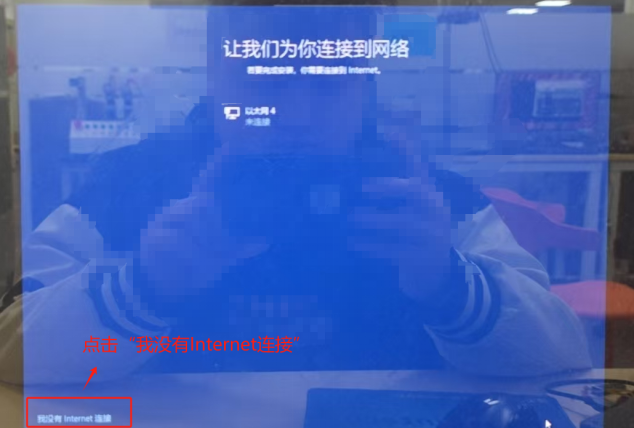
点击“我没有Internet连接”
Click "I don't have internet".
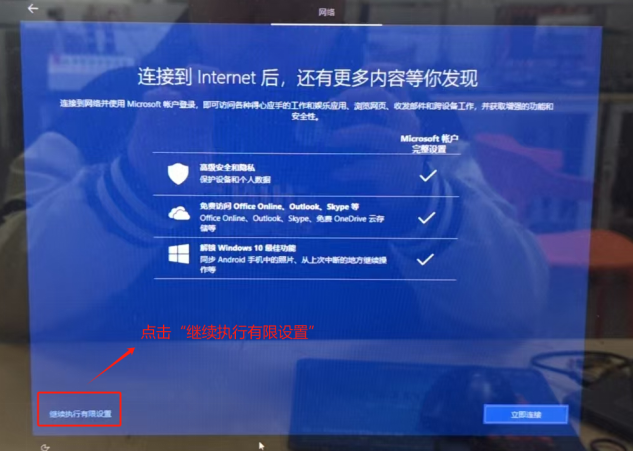
点击“继续执行有限设置”
Click "Continue with limited setup".
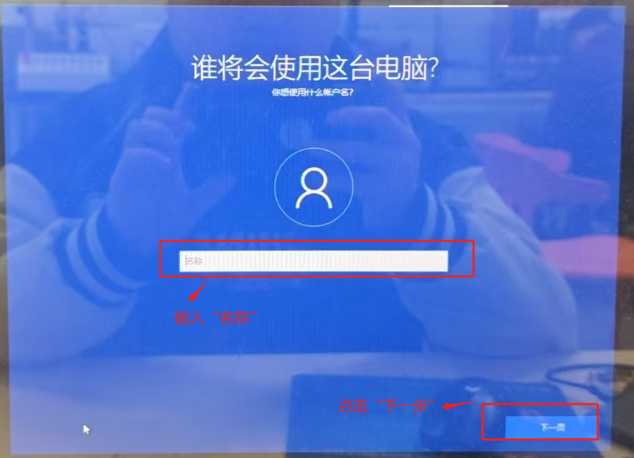
输入“名称”,点击“下一步”
Enter a name, click "Next".
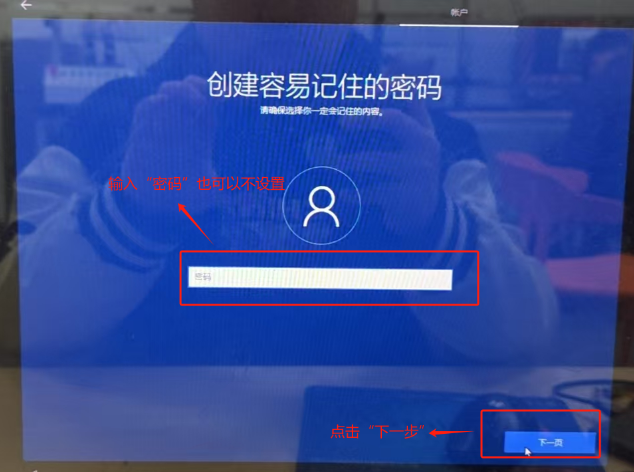
密码可以设置也可以不设置,点击“下一步”
Password optional, click "Next".
点击“接受”
Click "Accept".
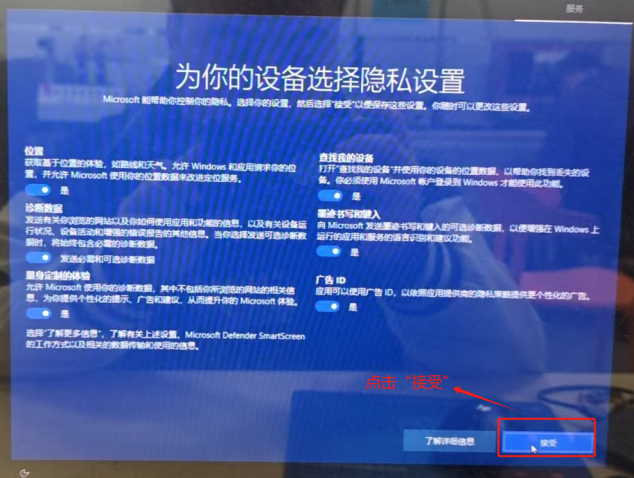
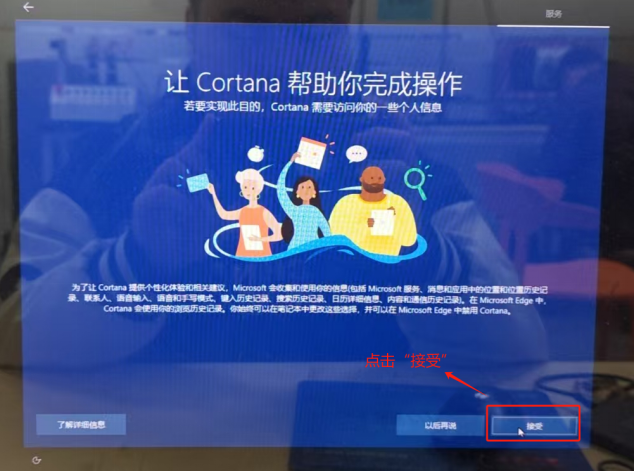
点击“接受”
Click "Accept".
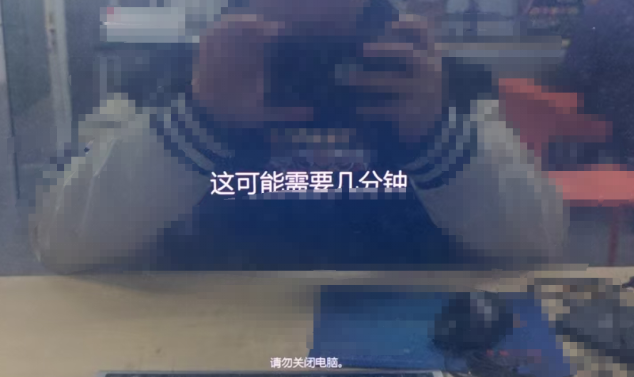
等待安装
Waiting for setup.
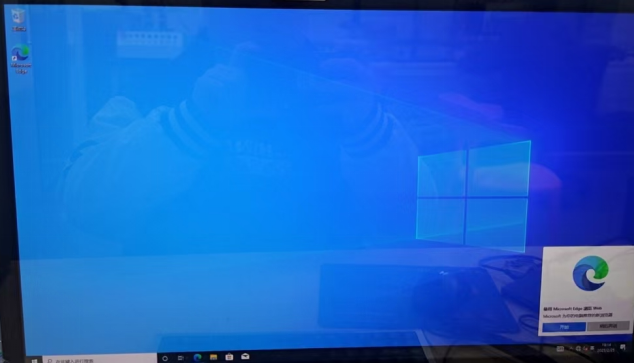
安装完成
Installation completed.
—— 教程结束 ——
—— End of Guide ——
精选新品热销
为您精心挑选两款智能护理产品,结合先进科技与人性化设计,提升生活品质与健康体验


